Showing posts with label makeup. make up. Show all posts

9 July 2015

FOTD (+ Mini Reviews)

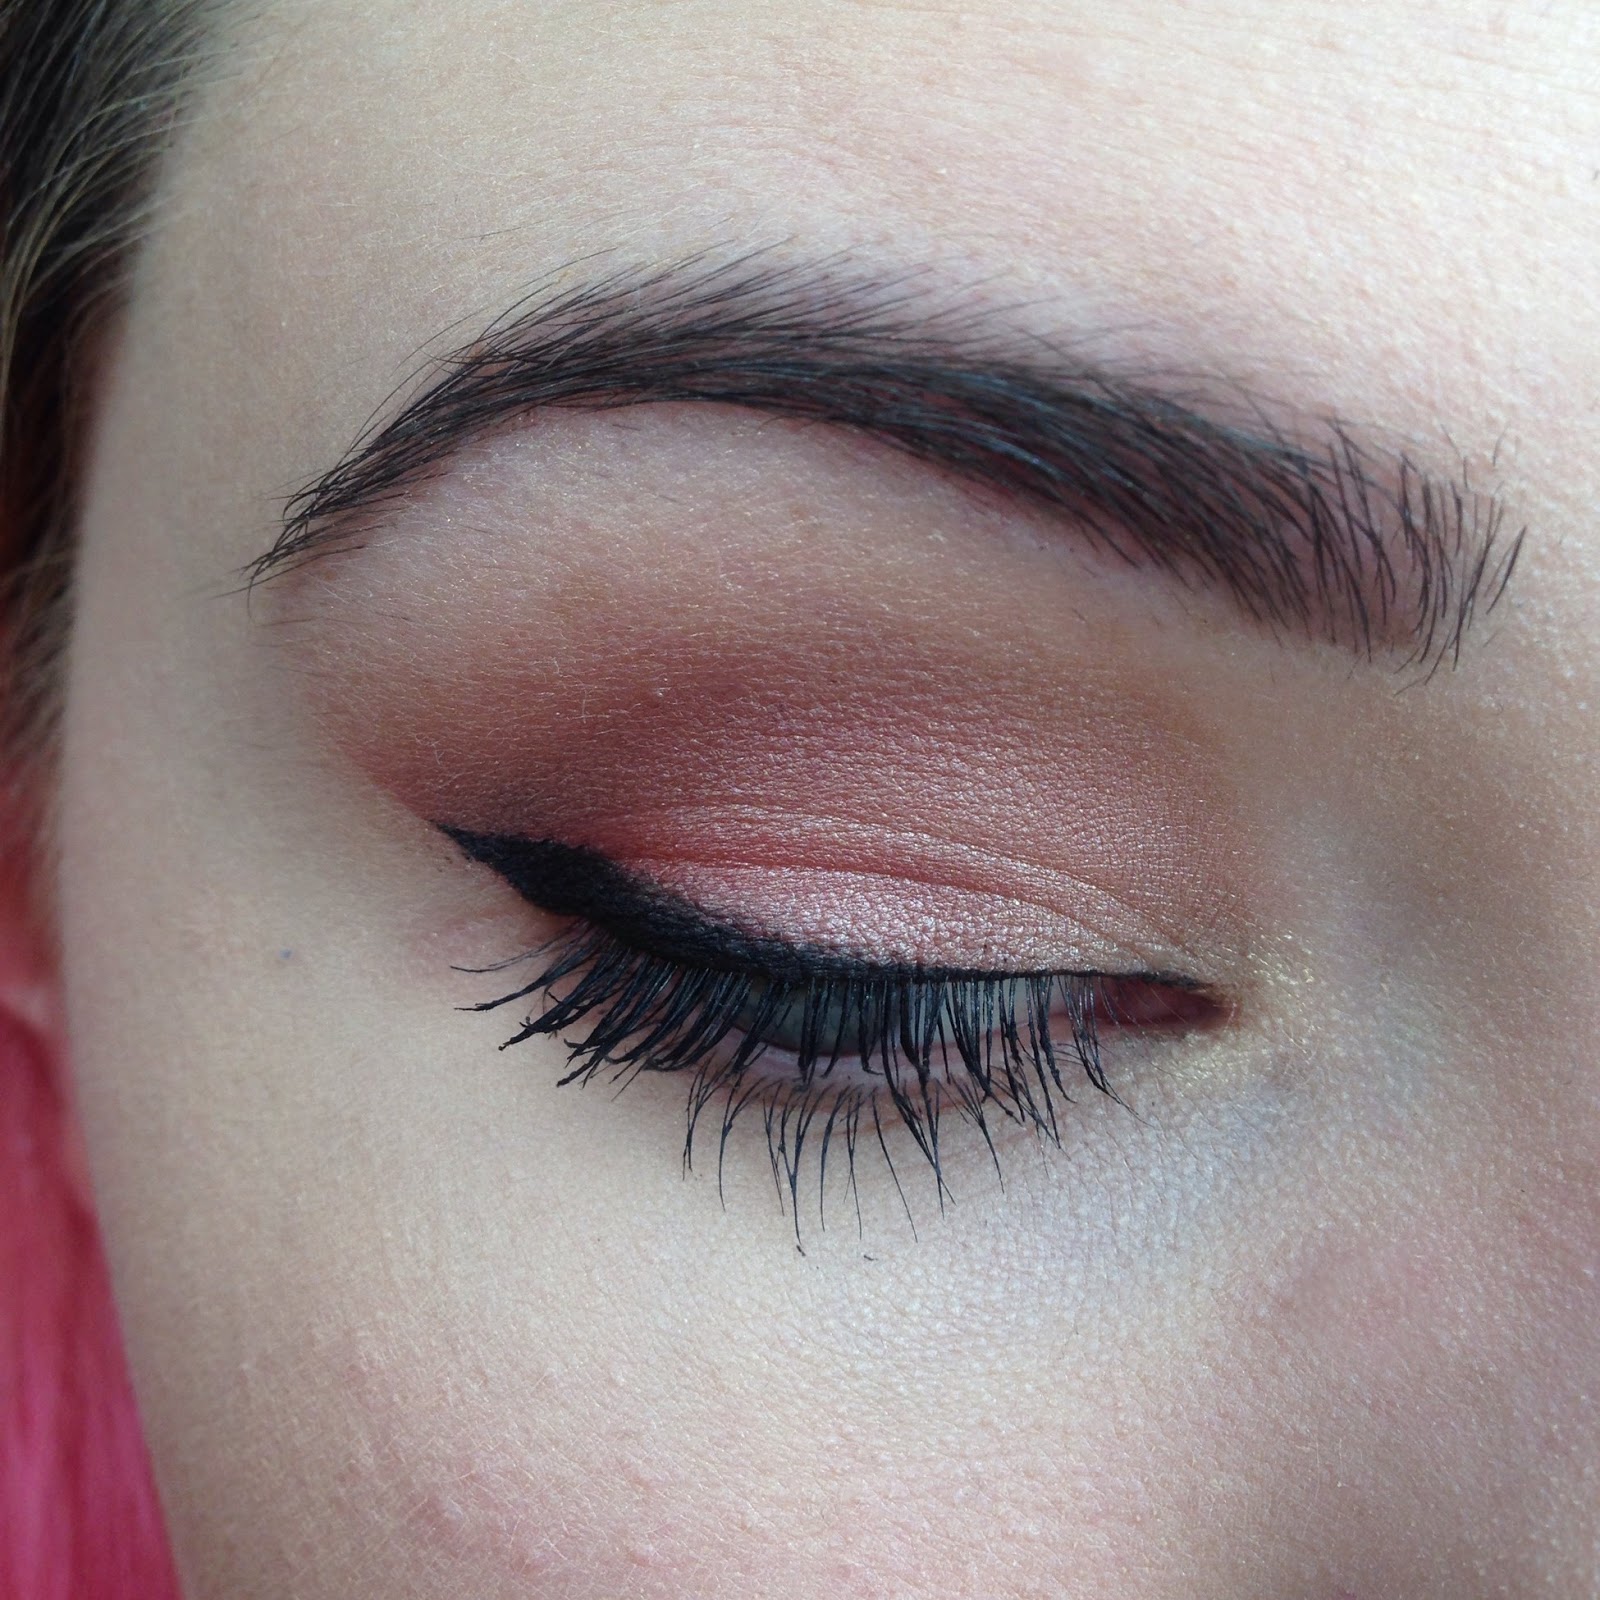
Today I decided to give something different a go. I have a collection of various makeup samples sitting in a drawer so I dug them out and did a FOTD using entirely free samples.


 I wish I had a sample of some sort of brow product because I think my face looks unfinished without them being filled in but other than that I think it turned out alright.

The products I used were:


  • Mac Skin Base Visage Primer
 I liked this, it made my skin feel very soft and its slightly shimmer when you look at the product but its unnoticeable  on your face so I think it might have a similar but possibly more subtle effect as Hourglass Ambient Lighting Powder. I can't say anything about if it makes foundation last any better than usual because I didn't keep my makeup on for very long and I wasn't wearing my usual foundation anyway.I'd definitely like to buy a full size of this since I've been looking for a new primer to change to for a little while and this felt lovely on my skin.
  • Bare Minerals Complexion Rescue in Vanilla 02
The coverage of this was far too sheer for my liking, I didn't feel like it evened out my complexion at all which is what I was hoping it would do. I prefer a medium to full coverage foundation because I have some redness which I don't like. The colour of this was a really good match for me though which I was surprised by since free samples of foundation rarely match my skin (looking at you Mac). I definitely wouldn't buy a full size of this but I might look at their other foundations since the colour was really good for me and I've never even considered them before.
  • Urban Decay Primer Potion in Sin
I already know that I like Urban Decays original Primer Potion so this is fairly similar. I expected it to be a lot more shimmery on my lid than it was but once it was blended in it wasn't very noticeable. It works fine for stopping eyeshadow creasing but I didn't notice any difference to the intensity of my eyeshadows shimmer. I wouldn't bother buying the full size of this because I already have a full sized tube of the original which I expect will last me ages. 
  • Shiro Cosmetics Eyeshadow in You Can Mclean On Me
I liked the colour of this eyeshadow and it was decently pigmented but I cant get past it being a loose powder. I really don't like loose powders because I find them such a hassle. I wouldn't buy the full sized version of this but they are really cheap so I understand why people do and I don't want to put anyone off if they're someone who doesn't mind working with loose eyehadow.
  • No7 Stay Perfect Liquid Eyeliner in Mermaid
I love the colour of this eyeliner, it's beautiful and not something I would usually go for. I wish it was a bit more pigmented and opaque because it was very patchy when I applied it and I really had to build up the colour. The staying power off this eyeliner though, is incredible. I literally had to soak my eyelids with coconut oil for a little while to take it off because nothing else would shift it. The brush is a bit thick for my taste but from looking at pictures I think that the brush on a real one is much thinner so that might only be a problem with the sample. I hate when companies do things like that though, why is it not completely the same, I want to know about everything including the applicator before I buy! I wouldn't buy a full sized version of it though because I can't see myself using a huge amount of that colour. I know they do sell other colours but when I've swatched them in the past I haven't seen nearly the same amount of saying power.
  • Mac False Lashes Extreme Black Mascara
I wanted to like this because I usually love big dense brushes but this one might have been too big and dense. I thought it ended up getting a bit messy because the brush was accidentally touching my skin and it was definitely too big too use on my lower lashes. It might be less annoyingly big if the wand was longer like in a full version though. I don't think I would buy this because I didn't think it was good enough for the price tag.
  • Benefit Lollitint
I liked this, it's kind of pinky purple and I like a purple blush. I have a hard time applying these though because I don't like to dot it straight on my cheek because sometimes it ends up not blending well enough and leaving me with darker dots where i applied it. I ended up applying it by wiping some onto my finger and blending it onto my cheek like that instead which worked quite well. I might consider buying a full version of this if I actually finished the sample version of it but I don't think I'll be using it a lot so I'm not sure.
  • Lancome Lipstick (I'm not sure what it is exactly)
I don't know what this is but I hate it. I didn't like the colour too much or the texture and the smell gave me a headache, it was so perfumey. I wouldn't buy this, not that I even know exactly what it is, and I threw out the sample because it was horrible.

8 July 2015

Too Faced Cocoa Contour Review


Part of me wants to ask why I bought this product, but deep down I know exactly why. They enticed me in with that delicious chocolate smell and I fell for it. I'd actually been really excited for buying one for a while but  it hadn't been available in the UK until recently when I saw it on Debenhams website and decided to pick it up. Most contouring kits come with at least 6 colour's which I think is a bit excessive for what I need personally, so I liked the look of this palette with only for shades.


I've been using Light Cocoa to set my concealer but that's really the only colour I expect to get any real use out of. Medium Cocoa isn't too warm for me so I could use it as a contour shade if I applied it with a very light hand and blended it a whole load, but I'd prefer to use something else which looks good without all of the extra effort. It might look good if I'm going to a club or something though so I might try it out for that. 

Dark Cocoa though, is so warm its practically orange. There is no way I can make that colour work on my skin as a contour without it looking like a streak of dirt down both of my cheeks and it's too dark for me as a bronzer. I hate pop of light too. I love highlighters, I really do, but this is horrible. It's not a nice sheen or even a shimmer, it's like a cream eyeshadow with huge chunks of gold glitter in it. I don't know who thought it  would be a good idea because when I tried it on my face I looked ridiculous. It doesn't look like my skin is catching the light, you can clearly see the giant pieces of sparkle!
 
T-B: Pop Of Light, Dark, Medium, Light
I do like the brush which comes with the kit though, especially for a brush which came with a palette because I don't often like the brushes which come with stuff. The only other Too Faced brush I have to compare it with is the Powder Pouf but I know all of their brushes are made of their teddy bear hair so I'm assuming they're all pretty similar. The Contour Buki is very similar in softness to the Powder Pouf but feels a tiny bit stiffer and for some reason smells a bit chemically but that'll probably wear off when its washed. The shape of the brush is pretty good for contouring too since its narrow and densely packed. I wish that the handle was a tiny bit bigger so it felt better to hold but I suppose it's that size to fit into the little slot in the palette.


Overall I don't think this palette is worth buying if you have quite pale skin. It might work better if you're darker but I cant say for definite since Dark Cocoa seems very warm to me. For 1, maybe 2, usable colours though, I don't think this palette was worth the money for me.

2 July 2015

FOTD

Limecrime Venus Palette Dupe - Inglot Freedom Palette

Recently I made myself an Inglot Freedom Palette which is a dupe for the Limecrime Venus palette but I hadn't actually got round to playing with it yet, so this week I decided to do a couple of looks with it. It was my first time using Inglot shadows and I'll do a full review later but they were so nice to use, they were pigmented and blended easily and felt almost creamy.

I didn't take a full face photo for the first eye look i did which i regret. Until now I've always been weary of pink and red eyeshadows so I decided to jump straight in at the deep end with this palette and used the pinks and reds, with a dark brown in my crease.


For the second look I used the browns but it ended up looking quite orange toned. I really love the highlight colour I chose for my palette to use in my inner corner, Inglot's 'shine' formula is so shimmery.


If I was going to do this look again I wouldn't do the double wing with the dark brown eyeshadow but I was in a hurry and didn't have time to take it off, so i decided to just go with it! I also decided to layer my lipsticks because I wanted something super opaque but not matte and i was really pleased with the results. I first applied Jeffree Star I'm nude and then layered Mac Pure Zen on top, giving me a really pigmented, glossy nude.

Product list

  • Maybelline Baby Skin Instant Pore Eraser Primer
  • Urban Decay Primer Potion
  • Mac Pro Longwear Foundation - NC15
  • Nars Radient Creamy Concealer - Chantilly
  • Mac Prep + Prime Transparent Finishing Powder (Pressed)
  • Benefit - Coralista
  • Makeup Academy Undress Your Skin Shimmer Highlighter - Iridescent Gold
  • Hourglass Ambient Lighting Powder - Diffused Light
  • e.l.f. Eyebrow Kit - Dark
  • Mac Fluidline - Blacktrack
  • Benefit Roller Lash
  • Urban Decay All Nighter Makeup Setting Spray 
  • *Look 1* Inglot Freedom Palette (397, 382, 450, 349, 329, 45)
  • *Look 2* Inglot Freedom Palette (361, 335, 329, 45)
  • *Look 2* Jeffree Star Velour Liquid Lipstick I'm Nude
  • *Look 2* Mac Pure Zen

30 June 2015

Shiro Cosmetics Review and Swatches


Shiro Cosmetics: "Cheekbones" Contouring Powders and highlighter

'Do Your Research', 'An East Wind Coming' and 'Curaga'

All across the internet I see people suggesting Nyx Taupe blush as a contour product for lighter skin tones, but personally I think that Shiro's Contouring Powder in 'Do Your Research' is amazing and I very rarely see it being suggested.

I'm not usually someone who is interested in indie makeup brands, the themed collections and loose powders don't really appeal to me, but when I heard about these Contour Powders I decided why not give it a go. After all, for $8 you get a huge 20g of product or if you're unsure you can order samples for just $1.50, so it's not exactly breaking the bank.

And honestly, I'm so glad I did try them because for the first time in my life I look like I have cheekbones. I've tried a ton of other contour products but, despite the fact that I'm pretty warm toned so theoretically warmer colours could possibly work, everything looked weird and unnatural. Do Your Research blends really easily and because it's a very grey toned taupey brown it looks incredibly natural.


The contouring powder is from the 'Cheekbones' collection, which is based around Benedict Cumberbatch which is why he's on the lid. It comes in a sifter jar, and I stupidly pulled the tape out when I first got it so half the powder ended up in the lid and I spent about a week carefully dipping my brush in so I didn't pick up too much. Then I realised that a better long term solution was to pull it apart so I could pour the powder back in and stick a fresh piece of tape over the holes so I could control the amount that I tapped out.

You only need the tiniest amount and I usually only uncover a couple of the holes to tap some into the lid then swirl my Real Techniques Sculpting Brush in it and rub it on the back of my hand to get off any excess. You could use a heavier hand for more a more dramatic contour. 

Included in my order were 2 free samples, one was another of the Cheekbones Contouring Powders, in the colour 'An East Wind Coming' and the other was an eyeshadow. The samples came in little baggies but there's still a fair amount of product in them. The website says that samples contain about a 1/4 teaspoon, but with the amount you need to use, even that much would last you a long time.

Originally I was torn between Do Your Research and An East Wind Coming but since I went with Do Your Research, I'm glad I was sent a sample of An East Wind Coming to compare the two. After seeing them swatched next to each other I found that An East Wind Coming was a very blue grey, and doesn't suit me as a contour but it's nice to have the reassurance that I chose the best colour for me.


I also bought a full size jar of the highlighter colour Curaga which is really beautiful and shimmery and very pigmented. I don't actually use it often though because it's a loose powder and I find them messy and prefer pressed powders. I can overlook the loose powder part for Do Your Research since it's such a perfect contour colour but for highlighters, I have pressed ones which I like better. The website describes it was a gold toned cream and even though it looks a bit pink in the jar it doesnt when its on my skin. Its very light so it would look best on pale skin tones. 


I used Urban Decay Primer Potion under the swatches to show the colour of them better since when applied normally, the colour is more subtle and blends into the skin really easily. When you see them separately, Do Your Research and An East Wind Coming both just look grey but when next to each other you can definitely see that An East Wind Coming is a lot more blue while Do Your Research is more Taupe.


Top- Bottom: Curaga, An East Wind Coming, Do Your Research
I was pretty happy with my indie makeup experience, depsite the shipping taking a few weeks, but since it was advertised as taking that long, I didn't mind. My order even came with a packet of skittles! My only real complaint is that I wish that Shiro Cosmetics had reviews for products on their website, or if they do they need to be easier to find because I like to research products before I buy them.


28 June 2015

DIY False Eyelash Storage

I have quite a few pairs of false eyelashes which I used to just keep in a clump in one of my vanity drawers, but one day I decided I was sick of peeling apart tangled lashes and searching for matching pairs. So I decided to make myself a cheap but still cute storage solution to keep my eyelashes in their pairs. 

1. 

I bought a large pill box for about 50p at a corner shop near my house but I've seen the same thing in loads of different places like poundland. I also used nail varnish remover, I'm not sure if it needs to have acetone in but the one I used did and the ones without it might not work as well.
 

2.


I used the nail varnish remover to clean off the writing on the lids of the boxes. It took a little while to start seeing results but then it very quickly comes off after that, leaving plain boxes.


3. 


I used flat back plastic pearl things that you can buy on ebay for literally pennies to decorate it wwith stripes and spots and flowers to make it look a bit cuter. The pearls are only a few pence for 500 usually.

4.


Finished! I filled it with eyelashes so now they're kept sorted into pairs. Before I use them, I bend them around my finger gently to makes them the right shape for my eyes so I'm not worried about them keeping their shape while I'm storing them.